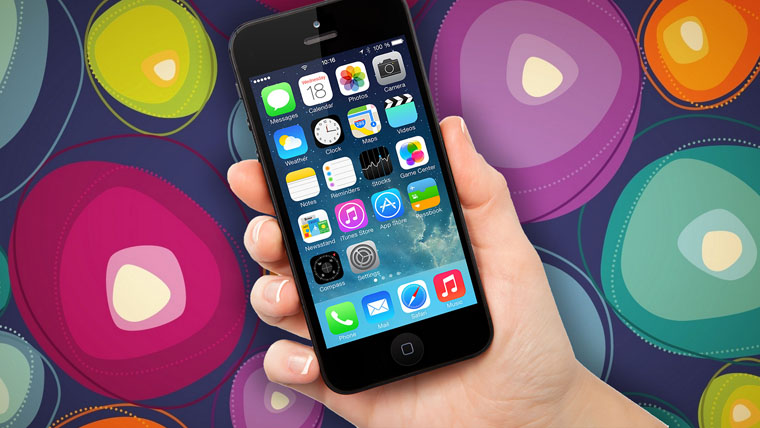
How to backup using itunes. Fresh hot apples. What you need to back up iPhone to windows computer
By regularly backing up your iPhone, you create a kind of airbag. It is she who will save you from accidental loss of important data and files in the event of an unexpected smartphone breakdown. How to backup iPhone and what is needed for this? In this article, we will discuss the need for backups and deal with the tools provided to us.
What are backups for?
The need to create backups is repeated by many articles and publications, experienced users and IT specialists. This is confirmed by hundreds of thousands of cases of loss of important data as a result of a breakdown of computer equipment. Yes, many users deliberately neglect the creation of backups, well aware of their importance.
The backup is:
- Securely reserved contact details;
- Storage of confidential data;
- Ability to save working documents;
- Extra copy of your photos and videos.
A backup is a snapshot of the current state of your smartphone, which includes almost all user data. If your iPhone crashes unexpectedly, you can always restore all your data from the last backup you made. As for users who neglect backups, they will be left with nothing - in the event of a breakdown or a fatal failure, all data will be lost, and forever.
If you are afraid of accidental data loss due to a smartphone breakdown or loss, be sure to back up your device. The optimal frequency for creating copies is 2-3 times a week or immediately after receiving / creating important files.
There are two types of iPhone backups - the first one is stored on the local computer and includes a huge amount of data, ranging from SMS to Bluetooth settings. This also includes application data and their settings, but not the applications themselves - they are downloaded separately and are not saved in the backup. A nice plus will be saving contacts, call list, all received / sent applications, all settings, calendar entries and much more.
The second type of backup is stored in iCloud and includes a limited amount of data - mainly settings are backed up here. Photos, videos, work files, messages, contacts, mail, and more are stored in iCloud in a separate form, so this data is not included in backups - why duplicate them twice in a row?
How to backup to iCloud
In order to back up your iPhone to iCloud, you do not need anything other than the smartphone itself - no cable or computer is needed. The creation of copies is activated in the iCloud settings, here you need to move the checkbox "Copy to iCloud". After that, the data will be backed up automatically while the iPhone is charging, in a locked state and connected to a Wi-Fi network.
In this mode, backup will be performed at night - it is during this period that all the above conditions most often coincide.
In order to start creating a backup in manual mode, you need to visit the iCloud settings and click on the "Create a copy" link there. Please note that if the five gigabytes allocated by the service are not enough for you, you can purchase additional disk space - it will be useful for storing large amounts of data.
How to back up iPhone to computer
If you do not have Wi-Fi access, then iCloud backups will not be possible - only a limited amount of data (contacts, calls, calendar entries and some other things) will be saved there. Therefore, now we will learn how to backup iPhone on a computer. To do this, we need the computer itself and a USB cable to connect the smartphone. To create a backup, you need to connect your iPhone to your computer and wait until it is detected.
Next, go to the "Overview" tab and look at the "Backups" section. Here we will see a field for choosing where to store the backup - select "This PC" and not "iCloud". Thus, we will ensure the storage of the most complete backup, and not its reduced version.. What to do next? After checking the box, click on the "Create a copy now" button and wait for the operation to complete. Under the button itself, we can see when the backup was last created. Once the backup process is complete (which may take a long time depending on the amount of data being backed up), iPhone can be turned off.
In order to backup iPhone to iTunes, you need to spend from a few minutes to half an hour. During this time, you will back up all important data and be able to quickly restore them in case of accidental breakdown of the smartphone or if it is lost.
Please note that the backup created through iTunes includes not only settings, but also all user files. Therefore, several backups can quickly fill up all the free space on your computer's hard drive. If you want to save space on your hard drive, delete old copies regularly.
Many iPhone owners have encountered a situation where data was lost on their mobile device. This is possible if a failure occurs, a glitch, or due to user inattention. The first two options are excluded. Ordinary users who very rarely install programs and games on their phones are not in danger of crashing the program. In this case, you can do without backups. But if you are an active user, then in order to avoid unsuccessful experiments, it is worth making a copy of the iPhone data. An iPhone backup will help you save all important data except for games, applications that have been installed, as well as downloaded music, videos, ringtones.
Two ways to create a copy:
1. On the device using iCloud;
2. On PC using iTunes.
Copy data directly from your phone.
How to backup iPhone directly from your device?
After opening the device settings, find “Copy to iCloud”, set this function. Every time you connect iPhone to the Internet, a copy of the data will be automatically created.
1. On your phone, go to Settings, open iCloud, "Storage and copies";
2. Run "Copy to iCloud";
3. When this function is enabled, you can create a backup yourself. All you have to do is click "Create a copy".
The iPhone has up to 5 GB of free space, which will be enough for backup.
Backup data on the computer.
The data can also be stored on the hard drive of the PC. Then access to the copy of the iPhone will be even when the computer is not connected to the Internet. You will get all the information you need from the backup if the iPhone is suddenly lost or broken. You can easily and quickly restore your iPhone from a backup.
To backup iPhone to computer:
1. We connect our device to the PC, and then launch iTunes;
2. Open “File”, look for “Device”, then click on “Back Up”. The save location is a local drive, even if you specified iCloud as storage.
You can carry out the process of copying iPhone data in another way.
1. To do this, go to iTunes, find the device sync settings.
2. Open the "Backup section", click "Automatically create copies".
3. Next, you need to select "This computer" and click on the inscription "Create a copy now."
Where can I find backups?
If your computer is running a Mac, then a copy of the iPhone data was copied to a folder that can be found like this: open the Library folder, then select MobileSync in Application Support, and view the backup in the Backup folder.
With a Windows XP base, the computer saves a copy of the data in the folder that we are looking for as follows: open Documents and Settings, then look for a folder with a username, go to Application Data, Apple Comruter, find MobileSync, open a copy of iPhone data in Backup.
And if Windows 7, 8 or Vista is installed on a personal computer, then you can find a backup copy as follows: the Users folder, namely, open the Username, AppData folder, find Roaming, go to Apple Computer, MobileSync and at the end Backup.
You now know where your iPhone backups are stored so you can find them faster if you need to.
iTunes, iCloud, alternative software and third-party cloud services.
Test versions of iOS, jailbreak experiments, constant switching from device to device, crash tests, as well as tons of software from the App Store and bypassing it - these are not all the reasons, why have I ever lost important personal data with iPhone.
But it’s not just hard-core geeks who are never at rest that face such difficulties. Despite the incredible reliability of Apple technology, for important information that you do not want to lose, you still need to prepare copies in a safe place.
To protect you from possible annoying misunderstandings, I have put together all the backup options that I personally tested.
1. iTunes and backup on Mac or PC hard drive

Advantages: With backup via iTunes, you can access information without the Internet - even in an open field. Moreover, it is one of the fastest options to save almost all data from iPhone.
Flaws: sorry, but making a backup copy or restoring data without a computer will not work with all the desire. Especially funny is backing up information from a large iPad Pro to a MacBook 12 ''. Plus - the copy takes up a lot of disk space, which is very noticeable on Macs with small SSDs.
What can be saved: Pretty much everything except content from the App Store and iTunes Store (it will download online), content synced via iTunes (imported audio recordings, and so on), stored in photo clouds (such as iCloud Photo Stream), Touch ID settings, and Apple Pay. Please note that some data needs to be backed up with a password.
How to do it: it's simple - just go to iTunes, go to the device tab and click one single button to create a copy or restore it.
My opinion: I myself use a backup to the hard drive of my MacBook Pro just before some stressful moment - installing a test version of iOS, jailbreak, and so on. In other situations, I prefer other types of saving personal information.
2. Alternatives to iTunes for backups using iMazing as an example

Advantages: with their help, you can not only access data without the Internet, but also feel like a real geek who uses not only standard software. In addition, alternatives may be more convenient in some specific cases - for example, to quickly save photos to your hard drive.
Flaws: all backup processes still require a computer, access to which is not always available.
How to do it: in most cases, a backup in iTunes alternatives is created or restored by pressing one or two buttons (for example, in the same iMazing). But each specific option may have its own nuances - in some solutions, you can save messages, contacts or other data separately.
My opinion: in some cases, the use of alternatives for iTunes may even be more than appropriate - especially on PCs, for which Apple's program is simply not designed. It works extremely clumsily even on fairly productive computers. But on a Mac myself, today I still lean towards the standard solution.
3. iCloud as a cloud storage for iPhone backups

Advantages: In this case, a computer is not needed. And that's great.
Flaws: A potential pay-off for a lot of storage for those who find the free 5 GB too low. Plus - without the Internet, all this is useless.
How to do it: you need to go to the backup menu from the iCloud section in the system settings of the device (Settings - iCloud - Backup)- all necessary functions are available here.
My opinion: despite the fact that today I use only Apple devices (MacBook Pro, iPhone and iPad), many interesting services have been “living” with me since my first Android smartphone (HTC Wildfire, if memory serves). So my primary cloud is Google Drive, not iCloud. And in the latter, I rarely have enough free space for backups.
4. iCloud and Apple's proprietary services for saving data from iPhone

Advantages: Data is synchronized in real time. And during the recovery, you can safely use the device. This is especially convenient when, for example, you are testing a new iPhone from partners. You enter your Apple ID details, and personal information is slowly pulled up over the Internet, without distracting you from using the device.
What can be saved: photos, mail, contacts, calendars, reminders, Safari bookmarks, notes, Wallet data, music collection in Apple Music and so on. The vast majority of modern mobile applications can work with iCloud Drive, and this can be very convenient.
How to do it: A set of data synced to iCloud is available from its section in the device's system settings (Settings - iCloud). Since many third-party apps can store information in iCloud Drive, you need to dig into their settings as well. Other Apple-branded services (such as Apple Music) give you access to information after entering your Apple ID.
My opinion: despite the fact that iCloud Drive is far from the main storage of my personal information, its free volume is constantly occupied by the data of some applications (there are just a bunch of text files from Byword). And it's very convenient. And about the coolness of modern Apple branded services, I generally keep quiet - what is Apple Music worth. And he successfully stores all my data in himself without any outside help.
5. Third-party cloud services for storing information on the example of Google

Advantages: Greatest versatility and access from any device. For example, Google's proprietary services are perfect for users who complement their work with an iPhone with an Android smartphone.
Flaws: iOS restrictions (after all, Apple prefers proprietary services), the ability to save far from all data, as well as the need to access the Internet.
What can be saved: mail, contacts, calendars, notes, as well as photos in Google Photos, music in Google Music, files in Google Drive and so on. And the same story with other similar services - for example, files of any type can be safely stored in Dropbox, and they will not go anywhere even in the most emergency cases.
How to do it: The setting for synchronization of mail, contacts, calendars and Google notes is available from the corresponding section of the device's system settings (Settings - Mail, addresses, calendars), while the loading of other data is configured from each individual third-party application.
My opinion A: If you use multiple devices from different manufacturers (maybe you have a PC instead of a Mac or an Android instead of an iPhone), you will definitely find it convenient to store basic data in Gmail - mail, calendars and contacts. In other cases, it is better to give all your information into the hands of Apple - it's more convenient.
All at once to minimize the risk of losing important records
Among iPhone owners, the procedure for “cleaning” the device of unnecessary files in order to get more free memory is very popular. The smaller the built-in memory of the smartphone, the more often you have to perform this operation. Sometimes this is even useful, but in the process of such a "cleaning" you can accidentally delete important files like messages, contacts and photos. Therefore, before these procedures, you need to backup your iPhone.
Of course, it is desirable that both backup and cleaning of the device are carried out in one place - this is both more convenient and safer. Not so long ago, we discovered an interesting utility for ourselves, which is not only a full-fledged replacement for iTunes, but also has many useful features, including cleaning up memory from unnecessary files and full / partial backup even over Wi-Fi.
To create an over-the-air backup, just go to the corresponding section of the AnyTrans application.

The first time you need to connect your iPhone to your computer, in the future, a backup will be created automatically if both devices are on the same Wi-Fi network.

The functionality of the backup partition is not limited to this. So, you can set up delayed backups - for example, after three days. In addition, the application will be able to notify you if the iPhone battery level drops below 10% or automatically start a backup if the charge level is below 20%.

If you don't need a full backup, you can always keep your most important files. To do this, we move to the next section of the application and go to the list of categories - audio, video, photos, contacts, and so on. Consider the possibilities of AnyTrans - as a rule, many people store important information in SMS.

To export messages from iPhone, it will be enough to open the corresponding tab, mark the necessary SMS, press the copy files to computer button in the upper right corner and select the destination folder. After a few seconds, the selected messages will be in the computer's memory - in the folder that you specify. The situation with other types of files is almost identical.


In addition, the program can download videos from YouTube (only on Mac so far, but soon such an opportunity will appear on Windows), optimize videos for playback on a particular iPhone model, copy application data, and even do. The only snag in the operation of the program may arise due to the lack of the Russian language, but in general the interface is logical and intuitive.
The backup feature is another reason to download this app for Mac or Windows. There is both a paid and a free trial with which part is available
Making backups is simple and at the same time very important. Three tips we can give to iPhone users: make, make and make backups again. This article will tell you all the ways to backup iPhone.
Why Back Up Your iPhone
iPhone is a valuable property, and even omitting the fact how much it costs, for the owner it is a repository of memories, whether it be photos from events that will never happen again, or valuable documents. Therefore, it is important to make sure that all this data is securely protected from loss, theft or accidental damage.
Also, several times a year, Apple releases iOS updates and we highly recommend just in case something goes wrong. Well, if you get a new phone model, a backup copy is the best way to transfer data from an old device to a freshly purchased one.
There are many ways to back up your iPhone, either locally on your PC or Mac, or online using a variety of cloud services, from the official iTunes and iCloud to numerous third-party ones.
In order to feel truly protected, we recommend using at least two available methods. If the worst happens and the backup gets corrupted, you'll have a spare.
For one iPhone it is better to have two backups
How to backup to iCloud
One of the easiest ways to back up iPhone data is to use Apple's own iCloud service.
Each Apple ID holder has access to 5 GB of data storage, where you can store bookmarks, contacts, calendars, iCloud documents, mail messages, notes, and your photo library. If you shoot a lot of photos and videos, you may need to increase the volume, as it will fill up pretty quickly.
Apple currently offers 50GB for $0.99/month, 200GB for $2.49/month, and 2TB for $6.99/month. It seems rather unfair that the allocation of free space is tied to the Apple ID, and does not increase as you buy more devices.
While iCloud backups are very convenient, they are best used in conjunction with iTunes to cover as much data as possible. iCloud backups can be created in the background every time your device is connected to a Wi-Fi connection.
You will need an iCloud account to create and use iCloud backups; it is usually created when you first set up your iPhone.
On your Apple device, open Settings. You will see your name and picture at the top. Tap it and select iCloud, and on the next screen, scroll down the long list Apps using iCloud and select the last entry - Backup.
Move the slider to the right to enable iCloud backup. As soon as you do this, your phone will automatically back up your data without your participation.
 Backup to iCloud only takes a few minutes
 How to make a backup on a computer
The good thing about a local backup is that you can manage it yourself instead of handing over all the power to the almighty cloud. Creating local iPhone backups is very easy thanks to iTunes.
Despite all the inconvenience that iTunes, for backup, this program is just the same very good. With it, you can get a complete backup of your Apple device in just a few minutes.
To do this, firstly, you need to connect your iPhone to your PC or Mac. In iTunes, in the upper left corner, under the playback controls, you'll see a small icon with a picture of your phone. Click on it and go to the device menu. In the panel on the left, select Review. A tab will be displayed with a section at the bottom Backups.
 Set up Local Copy in iTunes
 It has two options - copy to iCloud and local copy. Usually, by default, data is synced with iCloud. But if you prefer local backups, choose This computer so that iPhone data is automatically saved to your PC every time you connect your smartphone to it.
To the right of the selection of backup options there is a button Create a copy now. It allows you to manually start a backup from iPhone to your computer at any time. Button Restore from copy allows you to restore data on a device - new, after flashing or updating.
The backup will include: all photos on the device, contacts, calendar entries, Safari bookmarks, notes, call history, and some other data. Not copied: music, movies, and other content purchased from iTunes. Their iPhone will download again when you restore data from a backup. A complete list of what is copied and not copied can be found on the official Apple support website.
How to back up if you have an Apple Watch
iTunes also has the option of encrypting the backup. If your smartphone contains highly sensitive data, or you are simply concerned about security, you can use this option to further encrypt your backup with a password.
An encrypted copy of the data is made in the same way as a regular local copy (manually or automatically), but with the checkbox checked Encrypt iPhone backup. The first time you copy, you will be prompted to set a password. Keep in mind that only you will know the password - Apple does not store it. Therefore, if you forget it, you will not be able to restore it, and the backup will become useless.
But the encrypted copy includes some data that cannot be copied from the iPhone just like that. In particular, these are your passwords, as well as all data collected using the Apple Watch, including your progress in various types of physical activity. The reason for this is simple - it is purely personal data. So if you use an Apple fitness tracker, all your backups must be encrypted.
 Data from Apple Watch is saved only in an encrypted copy
 How to back up iPhone to a third party service
Security experts have a wise saying: "If you only have one backup, you don't have a backup." Making multiple copies of your data is the only way to ensure that it doesn't get lost, even if a natural disaster strikes.
Signing up for free accounts with Dropbox, Flickr, Google Drive, OneDrive, and more makes it effortless to back up your photos and documents. Pretty much all of them offer automatic syncing and it won't interfere with iCloud.
So download one or more of these apps and follow the instructions, and you'll have at least one more "alternate airfield" running in the background. However, be sure to check the settings of each application and uncheck Use mobile data, otherwise you may get an unpleasant surprise when it comes time to pay for cellular communication.
How to backup iPhone to Google Drive
Google recently added a new feature to the Google Drive app for iOS by introducing the ability to back up your contacts, calendar, and photo galleries to the cloud.
There is some slyness to this, as this feature encourages iPhone users to switch to Android. If you create a backup in Google Drive, then when you purchase an Android smartphone, data from the iPhone will be quickly restored to it. Of course, for example, your music collection will remain in iTunes.
However, Apple is not far behind: it has long had an application called Move to iOS, which does about the same thing when switching from Android to iOS. This is the symmetrical answer.